Blog

  • OS X Mountain Lion G.M Debuts for Developers, Final Release Soon

    OS X Mountain Lion G.M Debuts for Developers, Final Release Soon

    Today Apple released OS X Mountain Lion GM (Gold Master) build for developers only. This G.M version is almost equal to the final release of the new version. This G.M release is released to make sure that there are no issues or bugs left in the final build. If there are some, so they can be fixed before the public release of the OS X Mountain Lion. This new version of OS X Mountain Lion 10.8 would be bringing in hundreds of new features for OS X users including the side bar Notification feature, same as of the iOS would also be included in the final release.

    osx_mountain_lion_GM

    We expect the final release of OS X Lion might be done in few days because the G.M version is out, so the final release would be following it some time later this week. The OS X Mountain Lion would be released in the MAC APP Store with an initial launch price of $19.99. Once the final version of OS X Mountain Lion is released, every one could download the final build from the MAC APP Store and enjoy over hundreds of feature in it. All we have to do is to wait for the G.M to be cleared, so we can see the final release of OS X Mountain Lion.

  • How to Activate Find My Mobile on Samsung Galaxy S III

    How to Activate Find My Mobile on Samsung Galaxy S III

    The first ever smart phone designed for Humans and inspired by nature, Samsung Galaxy S III debuted about a month or two ago. The release of this Samsung Galaxy S III isn’t completed yet. Yet, there are some countries where Samsung’s Galaxy S III will be releasing in near future. Fortunately, we got our hands on the Samsung Galaxy S III soon after few days of the release. We were excited to have something that has just been announced officially. The Samsung Galaxy S III might be a great competition to Apple because they have added NFC Technology in it and some more great features that we have personally tested. We haven’t tested NFC because we don’t have this service yet at our place.

    Anyhow, we have come across a feature that every one owning an expensive Phone needs to have with it. The same goes for Apple’s iPhone. It is also present in them. The feature is no other feature than Find My Phone in Samsung and Find My iPhone for Apple. This is technically a service provided by Samsung and Apple for their Devices. Many other companies might be providing this service for their Devices, but we are only aware with these two well renowned companies. This service allows the owner of the Device to get the location of his lost/stolen Mobile with the help of GPS System integrated in the Phones. This service simply works by making an account on the respective webs and hooking up your Device with your account. Once done, you are secured.

    When we got our hands on Samsung Galaxy S III, we were looking for this service in it. We did found out this service, but were unable to activate it. We made an account on Samsung, signed up for this service, and we were unable to turn the service on. However, our GPS and everything was on. So today, we figured out the way to enable this feature on our Samsung Galaxy S III. We thought to share with you people so that you can also activate it easily without any hustle.

    The first thing you need to have is the Samsung Galaxy S III. Second, you need to have an account on Samsungdive web or an account made for Samsung Store. Third, you need to be signed into service from your Phone.

    After you have met all the requirements, follow the steps below to activate this service on your Phone.

    Step 1:

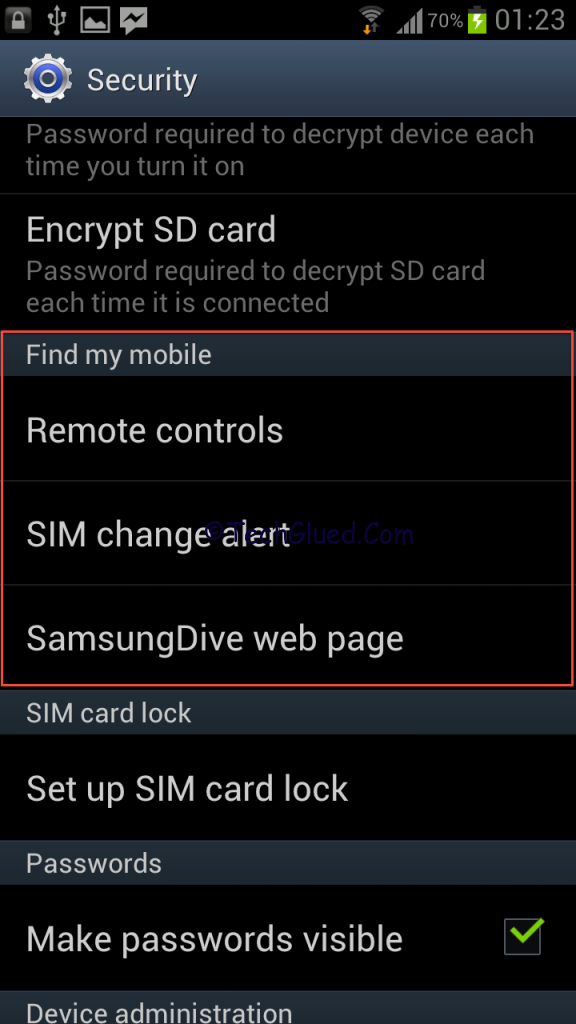
    Grab up your Samsung Galaxy S III and navigate to this location.

    Settings> Security> Find My Mobile

    find-my-mobile-samsung

    Step 2:

    Over there, you will see an option of Remote Control, SIM Change Alert, and SamsungDive Page.

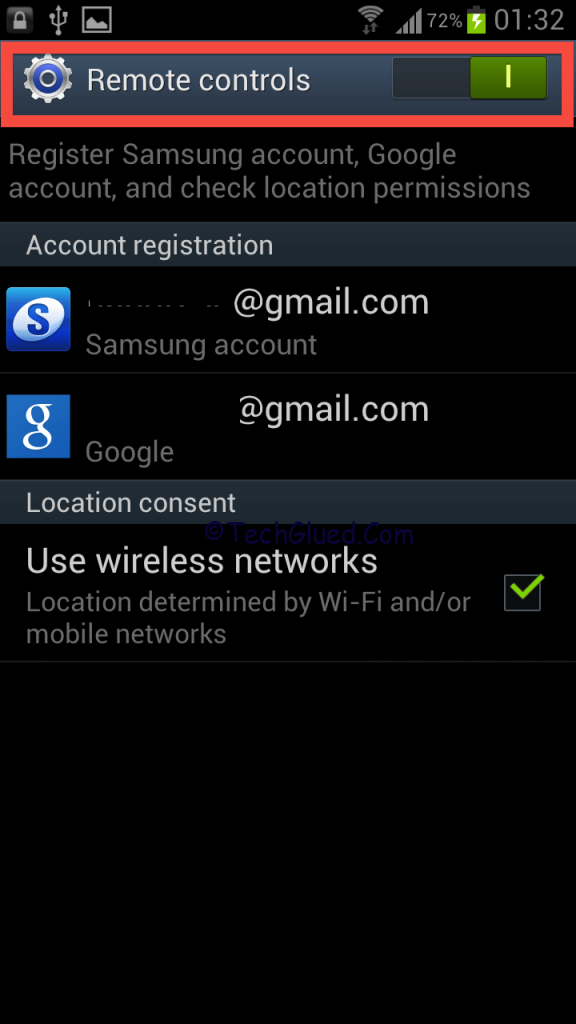
    You need to go into remote control option and make sure that you are signed in the account and the enable option is not workable, means you cannot enable or disable it. Don’t worry.

    remote-control-samsung-s-3

    Step 3:

    Now go back and go into second option of SIM Change Alert. Now in this option, it will say you to enable the service and add the number of the person whom you would like to notify about the changes made to the SIM.

    find-my-phone-sms

    Now enter in the number. Once done, go back to Remote Controls and activate it.

    In no time the Remote Control, option would be enabled. Once you have activated the REMOTE CONTROL feature, there is so much that you can do with it. All you need to do this just head over to samsungdive page and enter in with your ID and PASS.

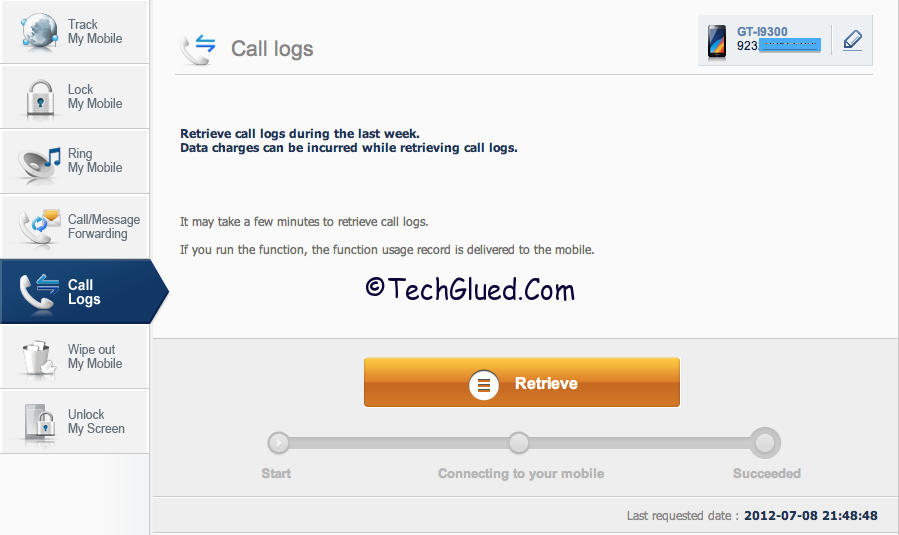
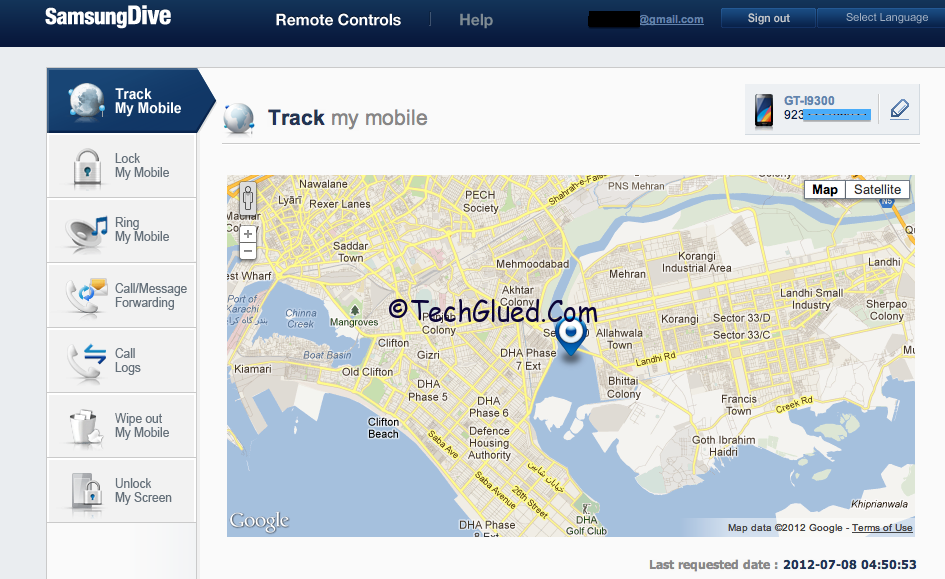
    Once you are in, you can avail all the awesome features that are present there. You can backup your recent call log, set up a pass-code on the screen with the message, beep your Phone and find it. Other than this you can track your Phone with interval of 15 minutes in 24-hours. Here is the demo of the interface of the samsungdive with it’s features.

    find-my-phone-s3-location

    call-log-s3

    Once you have activated this Remote Control Feature, there is so much that you can avail.

    Personally, if we compare the service of Samsung with the service of Apple’s Find My iPhone, the Samsung’s Service is better in features and service than Apple. We would love to hear your comments on this service.

  • Wireless Charging Introduced in iPhone 4S With a Mod (Video)

    Wireless Charging Introduced in iPhone 4S With a Mod (Video)

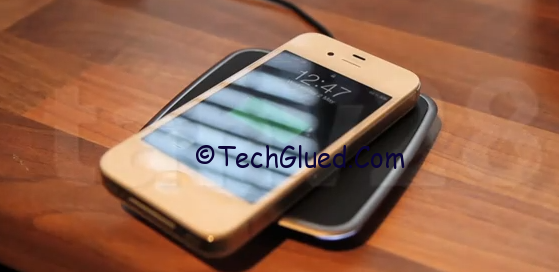
    The technology these days is moving on a great pace. If the mobile companies don’t innovate their product, they are left behind in dark and the one doing innovation would be leading the market. Same thing happened with Samsung. They introduced this wireless charging feature in their Samsung Galaxy S III that will be coming this fall. When this feature was announced by Samsung, it might have looked like this is something new and innovative. The fact is that, this technology is old. This technology is old in a sense that some Battery Manufacturing company I believe, made a case for the iPhone with the this power mat sort of pad on which you placed your iPhone and the charging used to start without any wires attached to it.

    wireless-charging-iphone-4s

    Some of you might have seen that charger for iPhone. If not, then no need to worry because what we are going to show you today is something unique and new in the market. No one would have ever imagined about this sort of thing would come in the market. We would like to show you an Advertisement of the thing at first about the thing that we are going to discuss.

    Advertisement:

    After seeing the ad, you might have got an idea about the thing that we are going to show you.

    The thing that we are going to discuss is the new mod made to iPhone 4S that allows the iPhone to charge wirelessly. Sounds interesting aren’t it. The mod is done by Tanveer Islam, who is a doctor and a Modder made his daily use iPhone 4S into a wireless charging device. This is something interesting. He simply mod his iPhone 4S with some steps that he has mentioned in his video. Before we move on to the real part, there are some precautions to be made before attempting these steps. First of all your iPhone warranty will be voided because, you would be doing some hardware changes. Second, you would need some basic tools to open an iPhone 4S. Third, you will need a soldering machine to sold out the wires. Fourth, you will need some patience, skills, and need to be brave hearten to perform these steps. We would recommend you to make a checklist before you proceed on.

    If you are ready with the checklist, now we would like to show you the video of the mod made by Tanveer.

    Video:

    Tanveer in this video has shown all the things that you need for this mod with the steps that you need to follow. At first, he simply solders wires with the designated number of the charging port shown in the video, and then he connects those wires with the power case mat to make the connection. After doing all, make sure that you are connected to the mat. Once everything is crosschecked, then simply assemble the iPhone back as shown in the video. Don’t forget that this mod increases 1mm thickness to the iPhone. So, make sure that you do everything correctly. Do at your own risk.

    Every time we get new mods for iDevices from third-party or users. We haven’t seen any innovative mod by Apple yet. We expect that Apple grabs some idea out of this mod and later on applies wireless charging in the upcoming iPhone 5 or in future releases of their iPhone’s.

    What do you people think about this mod? Is it worth it to do or not. Do let us know about your opinion’s in the comments section below.

  • How To Fix Most Common Errors While Restoring/Updating iDevices

    How To Fix Most Common Errors While Restoring/Updating iDevices

    When we talk about iPhone/iPod/iPad updating officially or Un-officially, we assume that it is a piece of cake.  The job is as easy as an ABC. Sometimes the task is as easy as an ABC and sometimes the task becomes a p.i.a for the users because iTunes popup’s a screen showing a dangerous word called “Error” 3194,1,2,20, and so on. This word Error is the worst nightmare for the people willing to perform a restore. This is the point from which they open up Google and start the search. They approximately waste their hours in searching for a solution and again hours in performing the solution.

    Some lucky users get bypassed the error and some are stuck on the error for days trying to see if they can get some ones help. The days turn out to months and months into years. They are still searching for the solution of those errors. That is not good.

    So we thought to come up with a perfect solution of the most common errors that a normal person faces during updating/restoring iPhone/iPod/iPad. We have made some great list of errors that every one of you faces once or more than once while doing the procedure. The errors are not new; they are the same old errors. The solution is new for those errors. The solution has been tested 100% by us and used in the same situations.

    Lets start with the first and amazing error that you people face while updating/restoring iPad/iPod/iPhone.

    “Error 3194”

    This is the Error that every one hates and faces while he is restoring/updating his iDevice to latest iOS or previous one.

    Why this Error Occurs?

    This error of 3149 occurs because you got an IP of 74.208.105.171 gs.apple.com and 127.gs.apple.com located in your hosts file. This IP prevents you from updating/restoring your iDevice.

    Solution:

    For Windows:

    Navigate to C:/Windows/System 32/Drivers/ETC/Hosts. Over there you will see a file of HOSTS. Open that with Notepad in Admin Mode or you can go to that location by opening notepad in Admin Mode.

    After you are in that file, simply delete the above stated IP Address with a # in its beginning.

    After you have deleted the IP, simply save the file and restart your computer.

    Now restore and it would work perfectly.

    For MAC:

    Open Terminal then type in /private/etc/hosts.

    Now delete the same IP Address stated above.

    Restart your MAC and then try again.

    “Error 1600”

    Why this error occurs?

    This error occurs while you are trying to restore to a custom IPSW and you are not using iReb to put your iDevice into DFU Mode.

    Solution:

    Use iReb to bypass this error. iReb will put your iDevice into PWNED DFU Mode.

    For people using MAC OS X, simply open up Redsn0w, go into extras menu and use PWNED DFU MODE.

    Now try the restore, it will work.

    “Error 1604”

    Why this Error Occurs?

    The iDevices was not entered into PWNED DFU Mode.

    Solution:

    Enter the iDevice into PWNED Mode and try again.

    “Error 21”

    This is the Error that screwed my life for hours. You might be the same victim of this error. This error comes very rarely, but when this error comes, it blows out because there is no perfect solution for this error. If you onto search for this error, they you need an iDevice replacement. Every one having an iPhone/iPod/iPad cannot do this thing.

    Why this error occurs?

    As per my experience this error occurs due to a hardware fault on your iPhone mostly. I only sawed this error on an iPhone so far. I don’t know if this occurs on iPod/iPad also.

    Solution:

    In my case the error 21 was occurring due to battery problem on an iPhone 4. The battery was semi dead. I changed the battery and the iPhone worked flawlessly.

    If you face this error on your iPhone/iPod/iPad while restoring to any IPSW, kindly consider a battery replacement or get your hardware checked.

    “Error 1015,1016”

    Why this Error Occurs?

    This error usually occurs due to a recovery loop on your iPhone/iPod/iPad. The device is stuck in recovery mode after a restore.

    Solution:

    To fix problem you got 3 alternatives

    1. Use iReb
    2. TinyUmbrella
    3. Redsn0w

    In iReb there is an option of Recovery Boot Fix. You can use that. If that doesn’t works, you can use Tiny Umbrella to kick your Device out of Recovery Mode. This usually works.

    If these all fail to work then you got Redsn0w. First of all download Redsn0w latest version. Open it; go into Extras and over there you will see Recovery Fix. Follow the steps and it will work.

    If all the steps fail to work, you can use my custom technique.

    Open up Redsn0w, place your iDevice into DFU Mode and do a Tethered Boot. This method also works.

    “Error 11”

    Why This Error Occurs?

    This error usually occurs when you are trying to restore to a CUSTOM IPSW or Normal IPSW in DFU Mode.

    Solution:

    To by pass this error make sure that you don’t have the GS.APPLE ip installed in the hosts file. If you got the IP in the hosts file, kindly remove it. Then use the PWNED DFU mode to restore your iPhone to a CUSTOM IPSW made by Sn0wbreeze or Redsn0w. This should work for you.

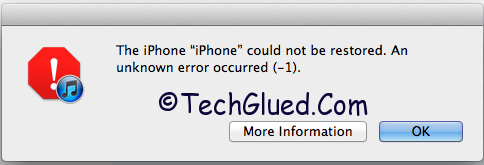
    “Error -1”

    Why This Error Occurs?

    This error usually occurs because you are using an Old method for the baseband preservation.

    Solution:

    The baseband isn’t updated after this error occurs. Simply use Tiny Umbrella and kick out of recovery. This should work for you.

    The guide is not completed yet. We will be updating the guide from time to time. We would appreciate if you can spare some time to tell us about the error code that you are facing while updating or restoring. We are making this post sticky, so every one can view it easily. Feel free to comment below with your Error Codes.

    ERROR! Please perform a clean “slide to power off” and try again.

    Why This Error Occurs?

    This Error occurs on iphone 3GS while downgrading iPad Baseband. You don’t need to worry about this error.

    Solution:

    This error occurs while downgrading the iPad Baseband because you insert the iPhone into DFU Mode before the process begins normally. This means you don’t need to put the iPhone into DFU Mode manually before the steps start.

    To solve this issue, manually turn off the iPhone 3GS and then proceed next for the DFU Mode and follow the steps to insert your iPhone into DFU Mode. Atfer you have followed the steps, simly try again the procedure for the iPad Baseband Downgrade. This time it should be done without any hustle.

  • The Secrecy Behind Burning Samsung Galaxy S III Unveiled

    The Secrecy Behind Burning Samsung Galaxy S III Unveiled

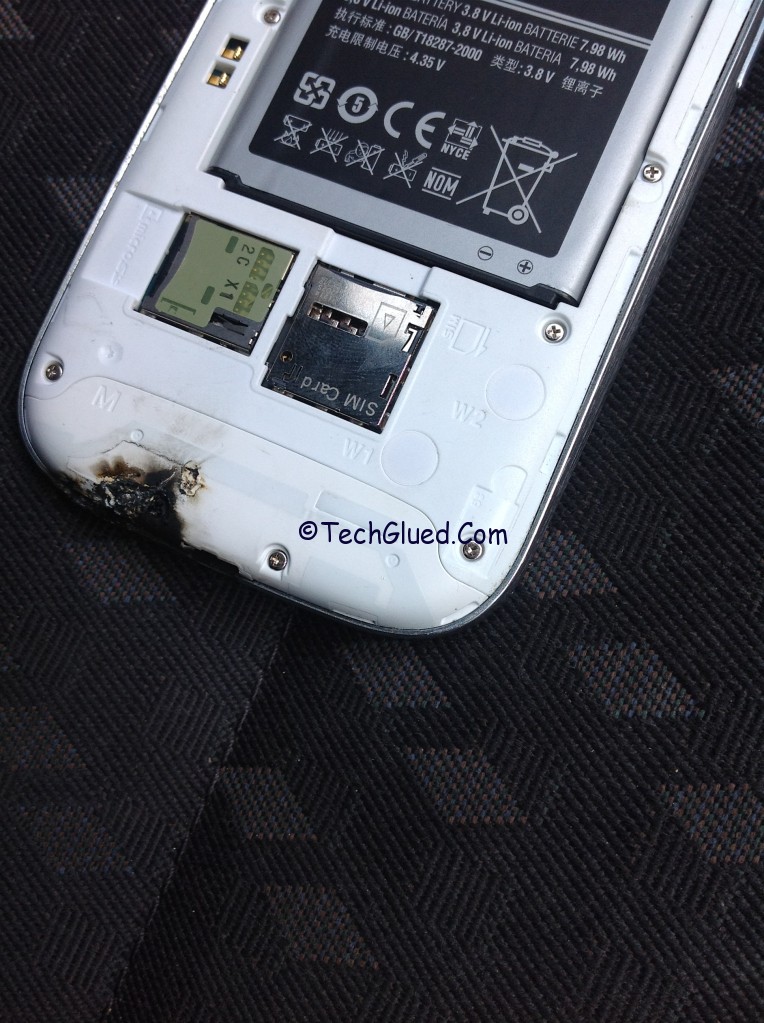
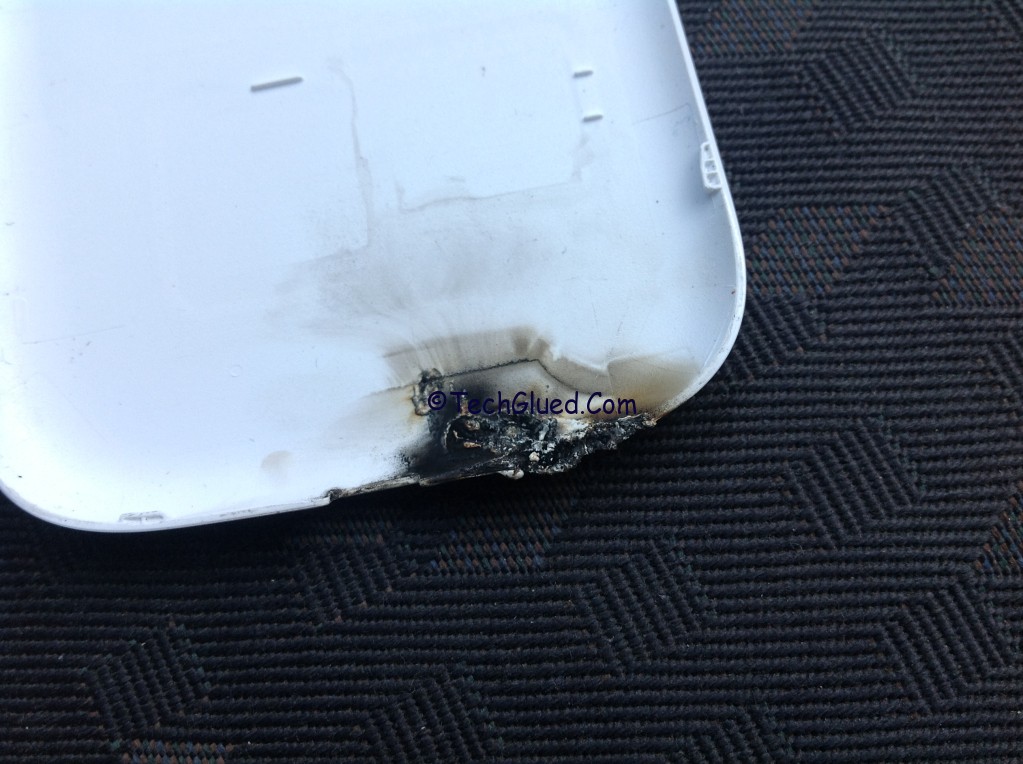
    The mysterious case of the burning Samsung Galaxy S III from bottom and back made a spiral in the reputation of Samsung. Not only in the reputation of Samsung, it also made other owners of the Samsung Galaxy S III go into great shock that how can this thing happen to the newly launched Phone that is only few months old. We were also shocked after hearing the news about that Samsung Galaxy S III that caught fire on its back while resting in car. You can see the complete detail about that bursting Samsung Galaxy S III here.

    The good thing was that the Phone was replaced by the company and was sent to the quality department for some investigation to find out the reason why this bursting occurred. Finally, today Samsung revealed the Mystery behind the burning of that Samsung Galaxy S III. The reason found out is something to be amazed. The reason told for Samsung Galaxy S III to burst out while relaxing in the car is shocking. You people would be shocked to hear the reason of its bursting. The reason is as a T.V Show called, Ripley’s Believe it or not.

    Now coming to the reason that the company found out was that the Phone sparked and busted into flames because of some external energy source that was assumed a Microwave. The phone was kept in Microwave that causes it to burst into flames. This reason was founded by the Korean company with its third party suppliers. Later on, they asked the person about the cause and he agreed with them that the Phone was kept into Microwave mistakenly because it got wet. The Phone got some special heating energy after going through great circulation in a microwave.

    samsung-s-3-fire-back

    Unbelievably, this is amazing. You keep your Phone into microwave because it got wet. Then you call the company to replace it for you because it was burnt. How amazing is it?

    We don’t know about the person who lied to get a new Samsung Galaxy S III and made this story, as a headline on every niche blog was charged or so. We for sure know that we learned a new lesson from this epic guy. Never ever, lie to get a new phone and never ever place your phone in the microwave to get it soaked. This will damage your phone and it might explode making major damage because it got lithium battery that is exposable in intense heat. The future and current owners of Samsung Galaxy S III shouldn’t worry about their Phone because there is no such hardware issue in your Samsung Galaxy S III.

    Don’t forget to share your point of view after reading this story.

  • Find and Call Trojan Spam App Hits iOS and Android

    Find and Call Trojan Spam App Hits iOS and Android

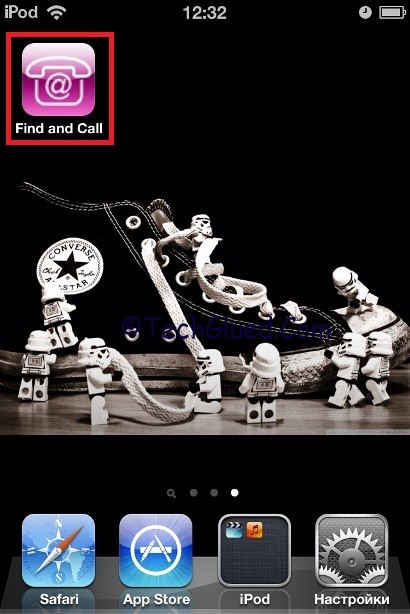
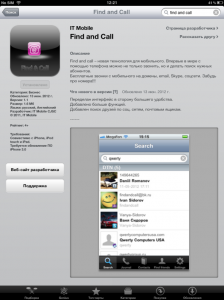
    Every one must be busy in their daily life without knowing that an App called Find and Call arrived the iOS App Store and Play Market as a Trojan. Some of you might have gone through that App or some of you might have downloaded that App because it is free for download. If you haven’t downloaded the App, so you are lucky and if you have accidentally downloaded the App, then you are unlucky. We will tell you why. Meanwhile, the source of this Trojan App comes form the blog of Kaspersky, the Antivirus Company that figured about this Trojan App.

    According to Kaspersky security lab, the App was released in the Apple App store and Google Play Market. At first glance, the App looked like a SMS worm spreading a SMS to download the App to every one in the contacts list with the download link. Later on, it was revealed that the App is not a SMS Worm it is a Trojan instead. Now we will tell you why you are unlucky if you have downloaded this App on your iOS or Android platform.

    find-and-call-ios  find-and-call-google-play

    Once the App is downloaded on your Device, it simply uploads the contact list from your address book on the server with the help of remote Trojan. After the upload is done, the Trojan simply sends an SMS to every one in your address book with the Download link of this App and stating the message to download the App from the respective platform because your friend has also download this App. The higher the chances are that your friend might have downloaded the App because the SMS was sent by your name from the remote server.

    Now your friend being a good friend downloads the same App Find and Call. The same happens with him. The Trojan uploads his Address Book and sends a SMS to every one in the list with the download link of this App. This is how the Cycle of Download goes on.

    Luckily, the Kaspersky Security Lab had reported about the presence of this Trojan App Find and Call to Apple and Google. Now it seems that the App is gone from the App Store and Google Play Market. The story doesn’t ends here. The access of this App in the App Store raises some serious questions against the Approval team of Apps at Apple that how could they allow such Malicious Apps in the App Store.

    On the other hand, a new security feature is coming to iOS that would stop all this malicious activities if an App requests to access your personal information. This new security feature would be debuting in the upcoming iOS 6 in which you can allow/disallow an App to access your personal information.